
Popular categories
Looking for a yarn?


|
||||||||||||||||||||||
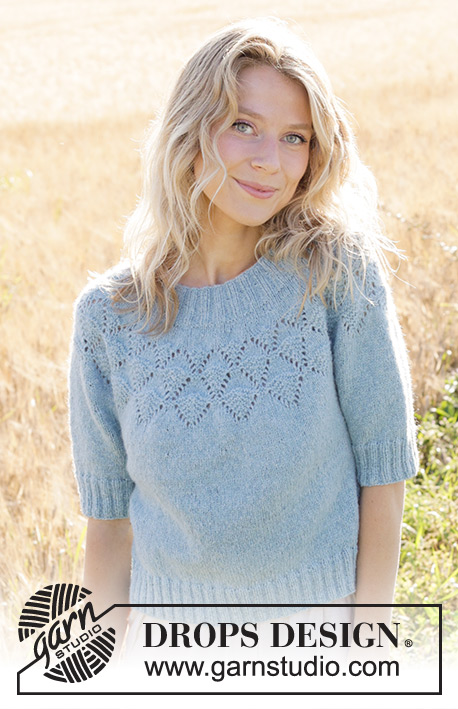
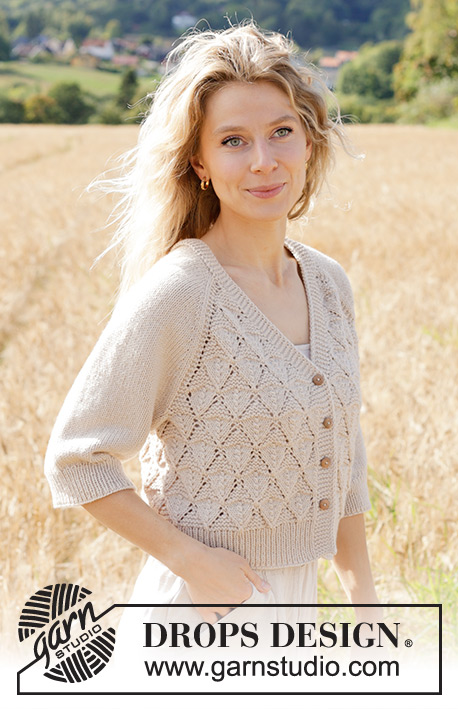
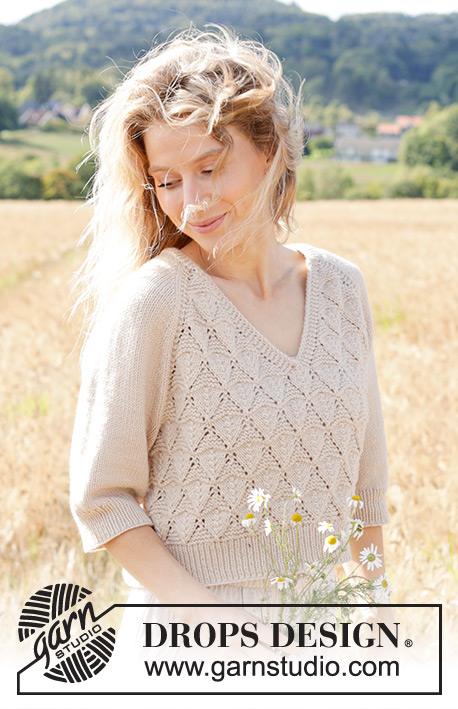
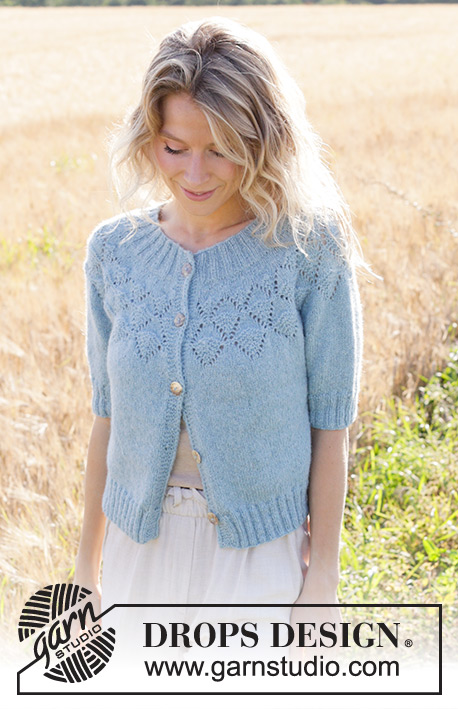
Blueberry Leaf Cardigan |
||||||||||||||||||||||
 |
 |
|||||||||||||||||||||
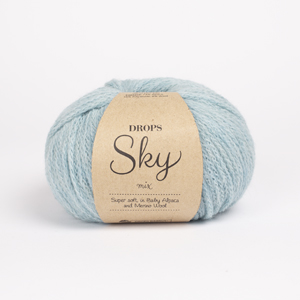
Knitted jacket in DROPS Sky or DROPS Merino Extra Fine. Piece is knitted top down with round yoke, lace pattern, I-cord and short sleeves. Size: S - XXXL
DROPS 249-10 |
||||||||||||||||||||||
|
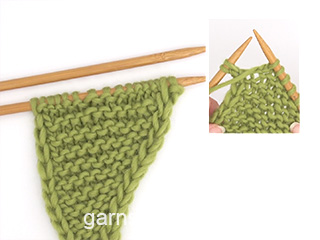
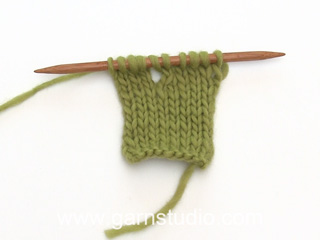
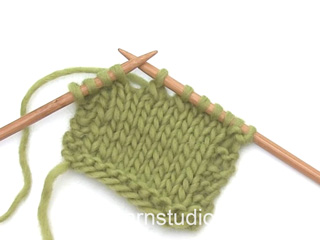
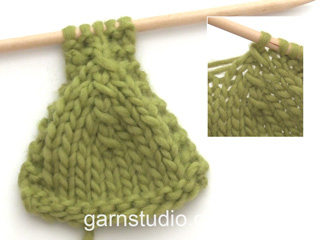
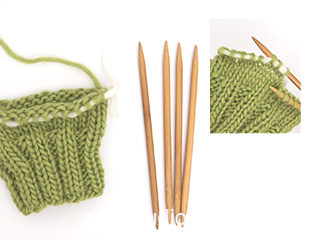
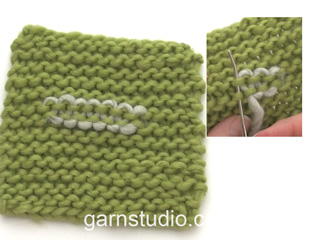
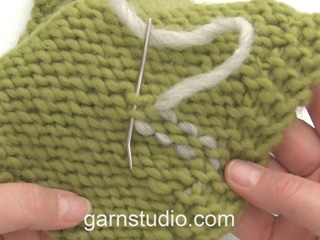
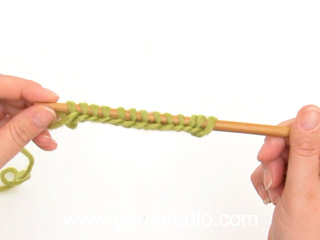
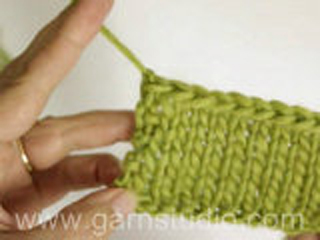
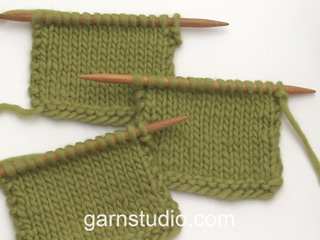
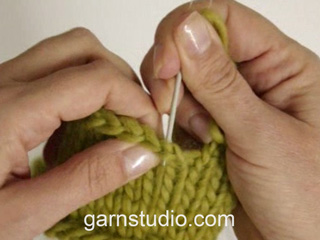
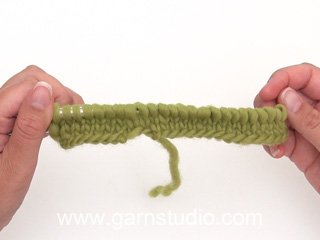
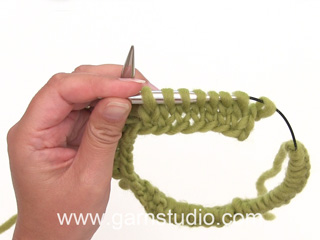
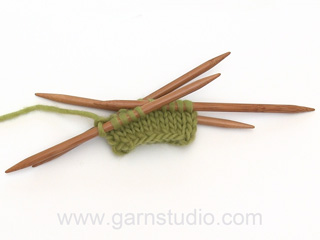
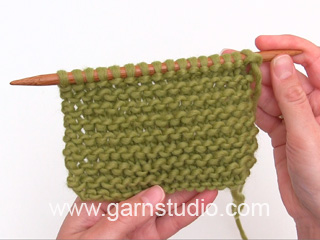
---------------------------------------------------------- EXPLANATION FOR THE PATTERN: ---------------------------------------------------------- GARTER STITCH (back and forth): Knit all rows. 1 ridge vertically = knit 2 rows. PATTERN: See diagram A.1 to A.6. The diagrams show all the rows in the pattern, seen from the right side. BUTTONHOLES: Decrease for buttonholes on right band (when garment is worn). Decrease from right side when 5 stitches remain on row as follows: Make 1 yarn over, knit 2 together, knit 1, slip 1 stitch purlwise with strand in front of piece, knit 1. On next row (wrong side) knit the yarn over to make a hole. Decrease for first buttonhole when neck edge measures approx. 2 cm = ¾" from cast-on edge. Then decrease the next 4-4-5-5-5-5 buttonholes approx. 9-9½-8-8½-9-9 cm = 3½"-3 5/9"-3⅛"-3¼"-3½"-3½" apart - the bottom buttonhole is placed approx. in the transition between stockinette stitch and rib. INCREASE TIP (applies to round yoke): To calculate how to increase evenly, use the total number of stitches on row minus band stitches (e.g. 122 stitches) and divide stitches by number of increases to be done (e.g. 29) = 4.2. In this example increase after approx. every 4th stitch by making 1 yarn over. On next row purl yarn overs twisted to avoid holes. BAND WITH I-CORD: BEGINNING OF ROW: Work band as follows: Slip 1 stitch purlwise with strand in front of piece, knit 1 and work 4 stitches in garter stitch. END OF ROW: Work band as follows: Work until 6 stitches remain on row, work 4 stitches in garter stitch, slip 1 stitch purlwise with strand in front of piece, knit 1. Work the same way both from right side and wrong side. DECREASE TIP (applies to sleeves): Decrease 1 stitch on each side of marker thread as follows: Work until 3 stitches remain before marker thread, knit 2 together, knit 2 (marker thread is between these 2 stitches), slip 1 stitch knitwise, knit 1, pass slipped stitch over stitch worked. ---------------------------------------------------------- START THE PIECE HERE: ---------------------------------------------------------- JACKET - SHORT OVERVIEW OF THE PIECE: In this pattern long and short needles have been used, begin with fitting length and switch as needed. Work neck edge and yoke back and forth on circular needle from mid front, work top down. When yoke is done, divide stitches for body and sleeves. Work body downwards back and forth on circular needle while putting the sleeves aside. Then work sleeves downwards in the round on needle. NECK EDGE: Cast on 134-138-142-146-154-162 stitches on circular needle size 3 MM = US 2.5 with DROPS Sky or DROPS Merino Extra Fine. Piece is worked back and forth from mid front. Work next row from right side as follows: Work 6 stitches BAND WITH I-CORD - read explanation above, work rib (knit 2, purl 2) until 8 stitches remain, knit 2 and 6 stitches band with I-cord. Continue back and forth like this, when piece measures 2 cm = ¾" bind off for BUTTONHOLES - read explanation above. Continue back and forth until rib measures 3 cm = 1⅛". On next row from right side increase all purl sections with 2 purl stitches to 3 purl stitches– increase with 1 yarn over between 2 purl stitches, knit yarn over twisted on next row = 164-169-174-179-189-199 stitches. Continue with band stitches as before and rib (knit 2/purl 3) until neck edge measures 5 cm = 2" in total and last row was worked from wrong side. Insert 1 marker mid back, measure yoke from this marker. YOKE: Switch to circular needle size 4 MM = US 6. Work back and forth in stockinette stitch with bands as before, at the same time on first row (from right side) increase 29-34-39-44-44-54 stitches evenly (do not increase over bands) - read INCREASE TIP = 193-203-213-223-233-253 stitches. Work until piece measures 3 cm = 1⅛" from marker mid back. REMEMBER THE KNITTING GAUGE! Work next row as follows from right side: Work 6 band stitches as before, work A.1 until 7 stitches remain, knit 1 as 1st stitch in A.1 and 6 band stitches as before. When A.1 has been worked vertically, there are 229-241-253-265-277-301 stitches on needle. Work next row as follows from right side: 6 band stitches as before, A.2, work A.3 until 13 stitches remain, A.4 and 6 band stitches as before. When A.2 to A.4 have been worked vertically there are 265-279-293-307-321-349 stitches on needle. Work next row as follows from right side: 6 band stitches as before, work A.5 until 7 stitches remain, knit 1 as 1st stitch in A.5 and 6 band stitches as before. When A.5 has been worked vertically, there are 283-298-313-328-343-373 stitches on needle. Piece measures approx. 12 cm = 4¾" from marker mid back. Continue with bands as before and stockinette stitch, at the same time on first row from right side increase 12-17-21-32-38-35 stitches evenly – remember INCREASE TIP = 295-315-334-360-381-408. Continue as before until piece measures 15-15-16-17-17-18 cm = 6"-6"-6¼"-6¾"-6¾"-7" from marker, on next row from right side increase 13-17-22-32-39-36 stitches evenly = 308-332-356-392-420-444 stitches. Continue with bands and stockinette stitch until piece measures 18-19-21-22-23-25 cm = 7"-7½"-8¼"-8¾"-9"-9¾" from marker. Now divide piece for body and sleeves as follows: Work the first 51-55-58-63-69-74 stitches as before (front piece), slip the next 58-62-68-76-78-80 stitches on a thread for sleeve, cast on 10-10-12-12-14-16 new stitches on needle (in the side under sleeve), work 90-98-104-114-126-136 stitches in stockinette stitch (back piece), slip the next 58-62-68-76-78-80 stitches on a thread for sleeve, cast on 10-10-12-12-14-16 new stitches on needle (in the side under sleeve), and work the last 51-55-58-63-69-74 stitches as before (front piece). Finish body and sleeves separately. Now measure piece from here! BODY: = 212-228-244-264-292-316 stitches. Work stockinette stitch and band as before until piece measures 14-15-15-15-16-16 cm = 5½"-6"-6"-6"-6¼"-6¼" from division. On next row from right side increase 38-42-46-50-54-58 stitches evenly (do not increase over bands) = 250-270-290-314-346-374 stitches. Switch to circular needle size 3 MM = US 2.5. Now work rib, first row is from wrong side: 6 band stitches as before, work rib (purl 2, knit 2) until 8 stitches remain, purl 2 and 6 band stitches as before. Continue like this until rib measures 6 cm = 2⅜". Bind off. Jacket measures approx. 44-46-48-50-52-54 cm = 17¼"-18"-19"-19¾"-20½"-21¼" from shoulder. SLEEVES: Slip the 58-62-68-76-78-80 stitches from thread in one side of piece on double pointed needles/a circular needle size 4 MM = US 6 and pick in addition up 1 stitch in each of the 10-10-12-12-14-16 new stitches cast on under sleeve = 68-72-80-88-92-96 stitches. Insert 1 marker in the middle of the 10-10-12-12-14-16 new stitches under sleeve (mid under sleeve), use the marker when decreasing under sleeve. Begin round at the marker. Work in stockinette stitch in the round, while AT THE SAME TIME when sleeve measures 3 cm = 1⅛" from division, decrease 2 stitches mid under sleeve - read DECREASE TIP (do not decrease in XXL and XXXL). Decrease like this every 2-1-1-1½-0-0 cm = ¾"-⅜"-⅜"-½"-0"-0" 2-2-2-2-0-0 times in total = 64-68-76-84-92-96 stitches. Work until sleeve measures 10-9-8-8-7-5 cm = 4"-3½"-3⅛"-3⅛"-2¾"-2" from division. 6 cm = 2⅜" remain until finished measurements. Try the jacket and work to desired length on sleeve. Knit 1 round while increasing 8-12-12-16-16-20 stitches evenly = 72-80-88-100-108-116 stitches. Switch to double pointed needles size 3 MM = US 2.5 and work rib (knit 2/purl 2) for 6 cm = 2⅜". Bind off. Sleeve measures approx. 16-15-14-14-13-11 cm = 6¼"-6"-5½"-5½"-5⅛"-4⅜" from division. ASSEMBLY: Sew the buttons on to the left band. |
||||||||||||||||||||||
Diagram explanations |
||||||||||||||||||||||
|
||||||||||||||||||||||

|
||||||||||||||||||||||

|
||||||||||||||||||||||
|
Have you made this or any other of our designs? Tag your pictures in social media with #dropsdesign so we can see them! Do you need help with this pattern?You'll find tutorial videos, a Comments/Questions area and more by visiting the pattern on garnstudio.com. © 1982-2024 DROPS Design A/S. We reserve all rights. This document, including all its sub-sections, has copyrights. Read more about what you can do with our patterns at the bottom of each pattern on our site. |
||||||||||||||||||||||


With over 40 years in knitting and crochet design, DROPS Design offers one of the most extensive collections of free patterns on the internet - translated to 17 languages. As of today we count 304 catalogs and 11422 patterns - 11417 of which are translated into English (US/in).
We work hard to bring you the best knitting and crochet have to offer, inspiration and advice as well as great quality yarns at incredible prices! Would you like to use our patterns for other than personal use? You can read what you are allowed to do in the Copyright text at the bottom of all our patterns. Happy crafting!
Comments / Questions (3)
Meine Frage bezieht sich auf den I-cord. Wenn in der Anleitung geschrieben ist, auf der Rückreihe 4 m kraus rechts, 1 M wie zum Linksstricken abheben und zuletzt eine rechte Masche stricken, bedeutet das, dass die letzte Masche LINKS gestrickt werden muss, damit sie auf der Vorderseite rechts erscheint?
28.04.2024 - 16:09DROPS Design answered:
Liebe Juliane, diese Masche wird rechts gestrickt, siehe auch dieses Video (time code 0:55 z.B.). Viel Spaß beim Stricken!
29.04.2024 - 09:38Bonsoir. Que veut dire i-cor dans vos explications ? Dans l'attente de vous lire. Cordialement
28.03.2024 - 19:57DROPS Design answered:
Bonjour Mme Nekkache, la bordure I-cord se tricote en début de rang/en fin de rang sur l'endroit/sur l'envers comme indiqué sous BORDURE DEVANT AVEC I-CORD: et comme le montre cette vidéo. Bon tricot!
02.04.2024 - 13:58Dreamy muscari
21.01.2024 - 16:10