
Popular categories
Looking for a yarn?


|
||||||||||||||||
Time to Unwind |
||||||||||||||||
 |
 |
|||||||||||||||
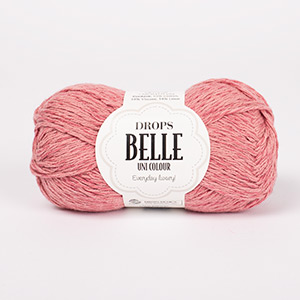
Knitted sweater in DROPS Belle. Piece is knitted bottom up with lace pattern. Size: S - XXXL
DROPS 231-37 |
||||||||||||||||
|
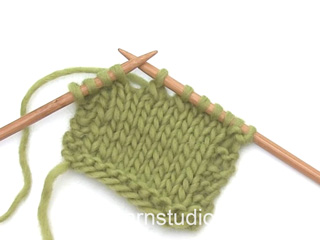
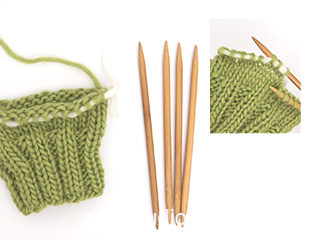
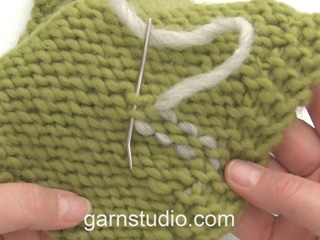
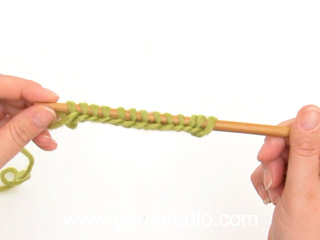
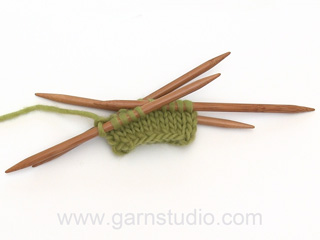
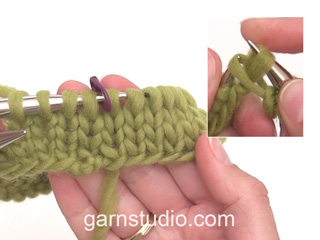
---------------------------------------------------------- EXPLANATION FOR THE PATTERN: ---------------------------------------------------------- GARTER STITCH (back and forth): Knit all rows. 1 ridge vertically = knit 2 rows. PATTERN: See diagram A.1. Diagrams show all rows in pattern seen from the right side. DECREASE TIP (evenly): To calculate how to decrease evenly, use number of stitches on needle (e.g. 106 stitches) and divide stitches by number of decreases to be done (e.g. 18) = 5,8. In this example decrease by knitting approx. every 5th and 6th stitch together. INCREASE TIP (applies to under sleeves): Work until 2 stitches remain before A.1 thread, make 1 yarn over, knit 2, A.1, knit 2, make 1 yarn over (= 2 stitches increased). On next round knit yarns over twisted to avoid holes. Then work the new stitches in stockinette stitch. ---------------------------------------------------------- START THE PIECE HERE: ---------------------------------------------------------- SWEATER - SHORT OVERVIEW OF THE PIECE: Work back piece and front piece first back and forth on circular needle separately until vent is done. Then work body in the round on circular needle up to armholes. Then work front piece and back piece back and forth separately. Work sleeves in the round on double pointed needles/circular needle up to sleeve, then work the rest of sleeve back and forth. Finish with a edge with i-cord. BACK PIECE: Cast on 112-124-136-148-164-180 stitches on circular needle size 3 MM = US 2.5 with DROPS Belle. Purl 1 row from wrong side. Then work rib as follows: Work 3 stitches in GARTER STITCH - read explanation above, work rib (knit 2/purl 2) until 5 stitches remain on needle, knit 2, work 3 stitches in garter stitch. Continue rib back and forth like this until piece measures 3 cm = 1⅛". Work next row from right side as follows: Work 3 stitches in garter stitch, knit the next 106-118-130-142-158-174 stitches and decrease at the same time 18-24-26-28-32-36 stitches evenly – read DECREASE TIP, work 3 stitches in garter stitch = 94-100-110-120-132-144 stitches. Switch to circular needle size 4 MM = US 6. Purl 1 row with 3 stitches in garter stitch in each side. Now work in stockinette stitch with 3 stitches in garter stitch in each side until piece measures 8 cm = 3⅛", adjust so that next row is worked from right side. REMEMBER THE KNITTING GAUGE! Cut the yarn. Put piece aside. FRONT PIECE: Work the same way as on back piece but do not cut the yarn. BODY: Now insert front piece and back piece on to same circular needle size = 188-200-220-240-264-288 stitches. Work in stockinette stitch in the round and continue with GARTER STITCH - read explanation above (= 6 stitches in garter stitch in each side). When 2 ridges have been worked over the 6 stitches, work pattern as follows: Knit 1 stitch. Insert a marker thread here (after this stitch). This is now the beginning of round. Knit over the first 92-98-108-118-130-142, A.1 over the next 2 stitches (= over the middle 2 stitches over the 6 stitches in garter stitch), knit over the next 92-98-108-118-130-142 stitches, work A.1 over the last 2 stitches (= over the middle 2 stitches of the 6 stitches in garter stitch). Continue in the round like this until piece measures 29-30-31-32-33-34 cm = 11⅜"-11¾"-12¼"-12½"-13"-13⅜" from cast-on edge. Now bind off stitches for armholes in each side as follows: Begin 0-0-3-5-9-13 stitches before beginning of round, bind off the next 2-2-8-12-20-28 stitches for armhole, work until 0-0-3-5-9-13 stitches remain before next A.1, bind off the next 2-2-8-12-20-28 stitches for armhole, work the rest of round = 92-98-102-108-112-116 stitches both for front piece and back piece. BACK PIECE: = 92-98-102-108-112-116 stitches. Work back and forth in stockinette stitch and with 1 edge stitch in garter stitch in each side. When piece measures 46-48-50-52-54-56 cm = 18"-19"-19¾"-20½"-21¼"-22", slip the middle 38-38-40-40-42-42 stitches on a thread for neck, and finish each shoulder separately. Then on next row from the neck, bind off 1 stitch = 26-29-30-33-34-36 stitches for shoulder. Continue back and forth with stockinette stitch and 1 edge stitch in garter stitch in each side, at the same time on next row from right side work short rows on shoulders as follows: Right shoulder: ROW 1 (= right side): Work over all stitches. ROW 2 (= wrong side): Turn, work until 6-6-7-7-8-8 stitches remain on needle. ROW 3: Turn, tighten yarn and work back. ROW 4: Work until 3-3-3-4-4-4 stitches more remain than on previous time. ROW 5: Turn, tighten yarn and work back. ROW 6: Work until 3-3-3-4-4-4 stitches more remain than on previous time. ROW 7: Turn, tighten yarn and work back. ROW 8: Work until 3-3-3-4-4-4 stitches more remain than on previous time. ROW 9: Turn, tighten yarn and work back. When short rows are done, bind off all stitches by purling from wrong side. Sweater measures approx. 50-52-54-56-58-60 cm = 19¾"-20½"-21¼"-22"-22¾"-23⅝" from shoulder and down. Left shoulder: ROW 1 (= right side): Work until 6-6-7-7-8-8 stitches remain on needle. ROW 2: Turn, tighten yarn and work back. ROW 3: Work until 3-3-3-4-4-4 stitches more remain than on previous time. ROW 4: Turn, tighten yarn and work back. ROW 5: Work until 3-3-3-4-4-4 stitches more remain than on previous time. ROW 6: Turn, tighten yarn and work back. ROW 7: Work until 3-3-3-4-4-4 stitches more remain than on previous time. ROW 8: Turn, tighten yarn and work back. When short rows are done, bind off all stitches by knitting from right side. Sweater measures approx. 50-52-54-56-58-60 cm = 19¾"-20½"-21¼"-22"-22¾"-23⅝" from shoulder and down. FRONT PIECE: Work as on back piece. When piece measures 43-45-46-48-49-51 cm = 17"-17¾"-18"-19"-19¼"-20", slip the middle 22-22-24-24-26-26 stitches on a thread for neck, and finish each shoulder separately. Then bind off stitches on every row from neck as follows: Bind off 2 stitches 3 times and 1 stitch 3 times = 26-29-30-33-34-36 stitches for shoulder. Continue back and forth with stockinette stitch and 1 edge stitch in garter stitch towards the armhole, at the same time when piece measures 47-49-51-53-55-57 cm = 18½"-19¼"-20"-21"-21⅝"-22½", work short rows on shoulders the same way as on back piece: I.e. work right shoulder as left shoulder on back piece, and left shoulder as right shoulder on back piece. When short rows are done, bind off. Sweater measures approx. 50-52-54-56-58-60 cm = 19¾"-20½"-21¼"-22"-22¾"-23⅝" from shoulder and down. SLEEVES: Cast on 64-68-72-72-76-76 stitches on double pointed needles size 3 MM = US 2.5 with Belle. Knit 1 round. Then work rib (= knit 2/purl 2) in the round for 3 cm = 1⅛". Knit 1 round while decreasing 12-14-16-14-16-14 stitches evenly - remember DECREASE TIP = 52-54-56-58-60-62 stitches. Switch to double pointed needles size 4 MM = US 6. Work pattern as follows: A.1 over the first 2 stitches, knit the remaining stitches on round. When piece measures 8-8-8-8-6-7 cm = 3⅛"-3⅛"-3⅛"-3⅛"-2⅜"-2¾", increase 1 stitch on each side of A.1 - read INCREASE TIP. Increase like this approx. every 3½-3-3-2½-2½-2 cm = 1¼"-1⅛"-1⅛"-1"-1"-¾" 12-13-14-15-16-17 times in total = 76-80-84-88-92-96 stitches. When sleeve measures 51-50-49-48-46-44 cm = 20"-19¾"-19¼"-19"-18"-17¼", work sleeve cap back and forth on circular needle until finished measurements. Continue to work in stockinette stitch from the middle of A.1 until sleeve measures approx. 52-51-51-51-51-51 cm = 20½"-20"-20"-20"-20"-20". Bind off. Work the other sleeve the same way. ASSEMBLY: Sew shoulder seams inside bind-off edge. Sew sleeve cap to armhole. Then sew vent at the top of sleeve to bottom of armhole - see chart. NECK EDGE: Begin from right side at one shoulder seam and pick up approx. 86 to 98 stitches (including stitches from thread) around the neck with circular needle size 3 mm = US c, cast on 3 stitches at the end of needle. Move the 3 stitches on to left needle so that the last stitch cast on on needle becomes the outermost stitch on left needle. Now work an i-cord in these stitches from right side, as follows: Knit 2, knit next stitch twisted together with the first/next stitch picked up around the neck edge. Move the 3 stitches from right needle back on to left needle (in the order they have). Continue like this along the entire neck edge on back piece until there are no stitches left to work. Bind off the remaining stitches. Sew the last 3 stitches together with the 3 stitches cast on at the beginning of neck edge. Fasten off. |
||||||||||||||||
Diagram explanations |
||||||||||||||||
|
||||||||||||||||

|
||||||||||||||||

|
||||||||||||||||
|
Have you made this or any other of our designs? Tag your pictures in social media with #dropsdesign so we can see them! Do you need help with this pattern?You'll find tutorial videos, a Comments/Questions area and more by visiting the pattern on garnstudio.com. © 1982-2024 DROPS Design A/S. We reserve all rights. This document, including all its sub-sections, has copyrights. Read more about what you can do with our patterns at the bottom of each pattern on our site. |
||||||||||||||||


With over 40 years in knitting and crochet design, DROPS Design offers one of the most extensive collections of free patterns on the internet - translated to 17 languages. As of today we count 304 catalogs and 11422 patterns - 11417 of which are translated into English (US/in).
We work hard to bring you the best knitting and crochet have to offer, inspiration and advice as well as great quality yarns at incredible prices! Would you like to use our patterns for other than personal use? You can read what you are allowed to do in the Copyright text at the bottom of all our patterns. Happy crafting!
Comments / Questions (28)
Det står att man ska sticka fram och tillbaka på ärmkullen. Men hur många maskor består ärmkullen av ?
14.04.2024 - 17:02DROPS Design answered:
Hei Cornelia. Det kommer an på hvilken str. du strikker (har du fulgt oppskriften og økningene har du 76-80-84-88-92 eller 96 masker). mvh DROPS Design
15.04.2024 - 14:26Hi, I'm working on Drops 231-37 at the binding off for armhole stage for size large. Instructions say to 'bind off (3 in my size) stitches before beginning the round. Does that mean the 3 stitches just before the 6 stitch lace pattern? Thank you!
24.01.2024 - 08:47DROPS Design answered:
Dear Lyn, in size L you will cast off for the armholes the 3 sts before A.1 + the 2 sts A.1 + the 3 sts after A.1 = 8 sts for each armhole. Happy knitting!
25.01.2024 - 07:56Bonjour, Je ne comprends pas ce qu'il faut faire pour l'encolure pour les 3 mailles que l'on doit rajouter? Faut-il tricoter l'encolure en rond ou en allers-retours?
09.11.2023 - 15:41DROPS Design answered:
Bonjour Mme Dossin, lorsque vous avez relevé les mailles autour de l'encolure, montez 3 mailles, puis rabattez maintenant les mailles avec la technique du I-cord - comme dans cette vidéo ou bien celle-ci. Autrement dit, tricotez toujours ensemble à l'endroit la 3ème de ces 3 mailles avec la maille suivante autour de l'encolure jusqu'à ce que toutes les mailles relevées autour de l'encolure aient été tricotées; assemblez les 3 dernières mailles aux 3 mailles montées au début. Bon tricot!
09.11.2023 - 16:08Ik ga starten met het heen en weer breien van de mouwkop op de rondbreinaald, echter in de beschrijving staat 'brei.....tot de gewenste afmetingen'. Dit snap ik niet. Wat is de gewenste afmeting? Ik brei maat M, maar geen idee hoeveel cm ik nu nog zou moeten breien. Ik kan het ook niet uit de afbeelding opmaken. Graag uw hulp hierin. Dank alvast.
19.10.2023 - 10:04DROPS Design answered:
Dag Sandra,
Voor maat M is dit dus totdat de mouw 51 cm meet. (Staat in de zin eronder)
19.10.2023 - 19:54Bij het afkanten van de steken voor de armsgaten met de rondbreinaald, is de omschrijving voor mij erg onduidelijk. Ik heb voor maat M 200 steken incl. A1 op de rondbreinaald, als ik volgens patroon brei, dan kant ik 2x 2 steken af: dus 1x op het voorpand en 1x op het achterpand, dit komt wel overeen met het aantal steken dat ik dan overhoud per pand: 98, maar er is geen symmetrie in de panden: 2 steken afgekant aan voorpand en 2 steken aan achterpand. Er klopt iets niet. Wat doe ik niet goed?
08.10.2023 - 16:20DROPS Design answered:
Dag Sandra,
Je kant aan beide kanten, zeg maar onder de oksel 2 steken af. Deze 2 steken zitten precies boven A.2
08.10.2023 - 16:54Saknar själva diagrammet till A1, ser bara förklaringen till symbolerna.
19.07.2023 - 22:18DROPS Design answered:
Hei Anette. Diagram A.1 ser du under ermet på målskissen, nederst på oppskriften / under diagramteksten. Om du ikke ser målskissen eller diagrammet, sjekk hastigheten på nettet ditt. Kankje det er går veldig treigt. mvh DROPS Design
25.07.2023 - 08:58Hallo, Ich finde das Diagramm nicht. Die Erklärung der Zeichen ist da, aber nicht die Musterzeichnung . Können Sie mir helfen?? Danke und vG Cornelia Mader
06.07.2023 - 19:54DROPS Design answered:
Liebe Cornelia, das Diagramm finden Sie rechts neben der Maßskizze unter dem Ärmel. Viel Spaß beim Stricken!
07.07.2023 - 17:07Hello, I am currently work your pattern 231-37. I have some problems knitting short rows around neck. Is it working in "wrap and turn" method? Ι am grateful for your assistance! Your work is amazing! Fotini
05.07.2023 - 12:36DROPS Design answered:
Hi Fotini, you can either use wrap and turn method or the simple basic technique HERE. Happy knitting!
05.07.2023 - 12:51Thanks so much for the quick response I received today for my question, but I think I didn't ask the question properly. I don't understand what the A.1 diagram is telling me. (i.e. the A.1 diagram is that little box with 8 boxes within & with diagonal lines on it - above this section. What is it telling me to do? Or is the information in the brackets following hte A.1 in the directions telling me what to do? So sorry to be so dense!! Thanks again, Lyn
16.06.2023 - 08:50DROPS Design answered:
Dear Lyn, the diagram A.1 is for the lace pattern, it's worked over 2 stitches (in width) and 4 rows (in height), as follows (in the round): Round 1: *K2 tog, YO*, repeat from *-*. Round 2 and 4: K all stitches. Round 3: *YO, slip 1, K1, psso*, repeat from *-*. Repeat the 4 rounds. Hope it can now help more :) Happy knitting!
16.06.2023 - 11:22What does this mean? A.1 over next 2 stitches ( = over the middle 2 stitches over the 6 stitches in garter stitch in each side)
15.06.2023 - 13:32DROPS Design answered:
Dear Lynn, when joining front and back pieces together you worked with 6 stitches in garter stitch on each side; and then knit 1 stitch. You now knit the first stitches, then work the 2 next stitches as shown in diagram A.1 (these both stitches are the 2 middle stitches of the 6 stitches worked previously in garter stitch), knit the next 92-142 sts (see size) and work the last 2 sts as shown in A.1 (these both stitches are the 2 middle stitches of the 6 stitches worked previously in garter stitch on the other side of jumper). Happy knitting!
15.06.2023 - 15:26