-------------------------------------------------------
Alternative Yarn – See how to change yarns here
Yarn Groups A to F – Use the same pattern and change the yarn here
Yarn usage using an alternative yarn – Use our yarn converter here
-------------------------------------------------------
Each of our patterns has specific tutorial videos to help you.
These step-by-step tutorials might also help you:
Why is the knitting/crochet tension so important?
Knitting tension is what determines the final measurements of your work, and is usually measured per 10 x 10 cm. It is provided like so: number of stitches in width x number of rows in height - eg: 19 stitches x 26 rows = 10 x 10 cm.
The knitting tension is very individual; some people knit/crochet loosely while others work tightly. You adjust the knitting tension with the needle size, which is why the suggested needle size is only meant as a guide! You need to adjust this (up or down) to ensure that YOUR knitting tension matches the knitting tension provided in the pattern. If you work with a different knitting tension than provided you will have a different yarn consumption, and your work will have different measurements than what the pattern suggests.
The knitting tension also determines which yarns can replace each other. As long as you achieve the same knitting tension you can replace one yarn with another.
See DROPS lesson: How to measure your tension/gauge
See DROPS video: How to make a gauge tension swatch
How do I know how many balls of yarn I need?
The required amount of yarn is provided in grams, eg: 450 g. To calculate how many balls you’ll need you first need to know how many grams are in 1 ball (25g, 50g or 100g). This information is available if you click on the individual yarn quality on our pages. Divide the amount required with the amount of each ball. For example, if each ball is 50g (the most common amount), the calculation will be as follows: 450 / 50 = 9 balls.
Can I use a different yarn than what the pattern suggests?
The important thing when changing from one yarn to another is that the knitting/crochet tension remains the same. This is so that the measurements of the finished piece will be the same as on the sketch provided. It is easier to achieve the same knitting tension using yarns from the same yarn group. It is also possible to work with multiple strands of a thinner yarn to achieve the knitting tension of a thicker one. Please try our yarn converter. We recommend you to always work a test swatch.
Please NOTE: when changing yarn the garment might have a different look and feel to the garment in the photo, due to individual properties and qualities of each yarn.
See DROPS lesson: Can I use a different yarn than the one mentioned in the pattern?
What are the yarn groups?
All our yarns are categorised into yarn groups (from A to F) according to thickness and knitting tension – group A contains the thinnest yarns and group F the thickest. This makes it easier for you to find alternative yarns to our patterns, should you wish to switch yarn. All yarns within the same group have a similar knitting tension and can easily replace each other. However, different yarn qualities have different structures and properties which will give the finished work a unique look and feel.
How do I use the yarn calculator?
At the top of all our patterns you’ll find a link to our yarn calculator, which is a helpful tool should you wish to use a different yarn than suggested. By filling in the yarn quality you wish to replace, the amount (in your size) and number of strands, the calculator will present good alternative yarns with the same knitting tension. Additionally it will tell you how much you’ll require in the new qualities and whether you’ll need to work with multiple strands. Most skeins are 50g (some are 25g or 100g).
If the pattern is worked with multiple colours, every colour will have to be calculated separately. Similarly, if the pattern is worked with several strands of different yarns (for example 1 strand Alpaca and 1 strand Kid-Silk) you will have to find alternatives for each, individually.
Why do you show discontinued yarns in the patterns?
Since different yarns have different qualities and textures we have chosen to keep the original yarn in our patterns. However, you can easily find options among our available qualities by using our yarn calculator, or simply pick a yarn from the same yarn group.
It is possible that some retailers still have discontinued yarns in stock, or that someone has a few skeins at home that they would like to find patterns for.
The yarn calculator will provide both alternative yarn as well as required amount in the new quality.
What size should I knit?
If you think it's hard to decide what size to make, it can be a good idea to measure a garment you own already and like the size of. Then you can pick the size by comparing those measures with the ones available in the pattern's size chart.
You'll find the size chart at the bottom of the pattern.
See DROPS lesson: How to read size chart
Why do I get the wrong knitting tension with the suggested needle size?
The needle size provided in the pattern serves only as a guide, the important thing is to follow the knitting tension. And since knitting tension is very individual, you will have to adjust the needle size to ensure that YOUR tension is the same as in the pattern – maybe you’ll have to adjust 1, or even 2 needle sizes, up or down to achieve the correct tension. For this, we recommend that you work test swatches.
Should you work with a different knitting tension than the one provided, the measurements of the finished garment might deviate from the measurement sketch.
See DROPS lesson: How to measure your tension/gauge
See DROPS video: How to make a tension/gauge swatch
Why is the pattern worked top-down?
Working a garment top-down provides more flexibility and room for personal adjustment. For example it is easier to try the garment on while working, as well as making adjustments to length of yoke and shoulder caps.
The instructions are carefully explaining every step, in the correct order. Diagrams are adjusted to the knitting direction and are worked as usual.
How do I work according to a knitting diagram?
The diagram depicts all rows/rounds, and every stitch seen from the right side. It is read from bottom to top, from right to left. 1 square = 1 stitch.
When working back and forth, every other row is worked from the right side and every other row is worked from the wrong side. When working from the wrong side, the diagram will have to be worked reversed: from left to right, knit stitches are purled, purl stitches are knit etc.
When working in the round every round is worked from the right side and the diagram are worked from right to left on all rounds.
See DROPS lesson: How to read knitting diagrams
How do I work according to a crochet diagram?
The diagram depicts all rows/rounds, and every stitch seen from the right side. It is worked from bottom to top, from right to left.
When working back and forth every other row is worked from the right side: from right to left and every other row is worked from the wrong side: from left to right.
When working in the round, every row in the diagram are worked from the right side, from right to left.
When working a circular diagram you start in the middle and work your way outwards, counter clockwise, row by row.
The rows usually start with a given number of chain stitches (equivalent to the height of the following stitch), this will either be depicted in the diagram or explained in the pattern.
See DROPS lesson: How to read crochet diagrams
How do I work several diagrams simultaneously on the same row/round?
Instructions for working several diagrams after each other on the same row/round, will often be written like so: “work A.1, A.2, A.3 a total of 0-0-2-3-4 times". This means you work A.1 once, then A.2 is worked once, and A.3 is repeated (in width) the number of times provided for your size – in this case like so: S = 0 times, M = 0 times, L=2 times, XL= 3 times and XXL = 4 times.
The diagrams are worked as usual: begin with the first row in A.1, then work the first row in A.2 etc.
See DROPS lesson: How to read knitting diagrams
See DROPS lesson: How to read crochet diagrams
Why are the sleeves shorter in larger sizes?
The total width of the garment (from wrist-to-wrist) will be larger in the larger sizes, despite the actual sleeves being shorter. The larger sizes have longer sleeve caps and wider shoulders, so there will be a good fit in all sizes.
Where on the garment is the length measured?
The measurement sketch/schematic drawing provides information regarding the full length of the garment. If it’s a jumper or a jacket the length is measured from the highest point on the shoulder closest to the neckline, and straight down to the bottom of the garment. It is NOT measured from the tip of shoulder. Similarly, the length of yoke is measured from the highest point on the shoulder and down to where yoke is split into body and sleeves.
On a jacket measures are never taken along bands, unless specifically stated. Always measure inside band stitches when measuring the length.
See DROPS lesson: How to read a schematic drawing
What is a repeat?
Diagrams are often repeated on the round or in height. 1 repeat is the diagram the way it appears in the pattern. If it says to work 5 repeats of A.1 in the round, then you work A.1 a total of 5 times after/next to each other in the round. If it says to work 2 repeats of A.1 vertically/in height you work the entire diagram once, then begin again at the start and work the entire diagram one more time.
Why does the piece start with more chain stitches than it’s worked with?
Chain stitches are slightly narrower than other stitches and to avoid working the cast-on edge too tight, we simply chain more stitches to begin with. The stitch count will be adjusted on the following row to fit the pattern and measurement sketch.
Why increase before the rib edge when the piece is worked top-down?
The rib edge is more elastic and will contract slightly compared to, for example, stocking stitch. By increasing before the rib edge, you avoid a visible difference in width between the rib edge and the rest of the body.
Why increase in the cast-off edge?
It’s very easy to cast off too tightly, and by making yarn overs while casting off (and simultaneously casting these off) you avoid a too tight cast off edge.
See DROPS video: How to bind off with yarn overs (yo)
How do I increase/decrease on every 3rd and 4th row/round alternately?
To achieve an even increase (or decrease) you can increase on, for example: every 3rd and 4th row alternately, like so: work 2 rows and increase on the 3rd row, work 3 rows and increase on the 4th. Repeat this until the increase is complete.
See DROPS lesson: Increase or decrease 1 st on every 3rd and 4th row alternately
How can I work a jacket in the round instead of back and forth?
Should you prefer to work in the round instead of back and forth, you may of course adjust the pattern. You’ll need to add steeks mid-front (usually 5 stitches), and follow the instructions. When you would normally turn and work from the wrong side, simply work across the steek and continue in the round. At the end you’ll cut the piece open, pick up stitches to work bands, and cover the cut edges.
See DROPS video: How to knit steeks and cut open
Can I work a jumper back and forth instead of in the round?
Should you prefer to work back and forth instead of in the round, you may of course adjust the pattern so you work the pieces separately and then assemble them at the end. Divide the stitches for the body in 2, add 1 edge stitch in each side (for sewing) and work the front and back pieces separately.
See DROPS lesson: Can I adapt a pattern for circular needles into straight needles?
Why is the pattern slightly different than what I see in the photo?
Pattern repeats can vary slightly in the different sizes, in order to get the correct proportions. If you’re not working the exact same size as the garment in the photo, yours might deviate slightly. This has been carefully developed and adjusted so that the complete impression of the garment is the same in all sizes.
Make sure to follow instructions and diagrams for your size!
How do I make a women’s size garment into a men’s size one?
If you have found a pattern you like which is available in women’s size it’s not very difficult to convert it to men’s size. The biggest difference will be the length of sleeves and body. Start working on the women size that you think would fit across the chest. The additional length will be worked right before you cast off for the armhole/sleeve cap. If the pattern is worked top-down you can add the length right after the armhole or before the first decrease on sleeve.
Regarding additional yarn amount, this will depend on how much length you add, but it is better with a skein too many than too few.
How do I prevent a hairy garment from shedding?
All yarns will have excess fibres (from production) that might come off as lint or shedding. Brushed yarns (ie hairier yarns) have more of these loose, excess fibres, causing more shedding.
Shedding also depends on what is worn under or over the garment, and whether this pulls at the yarn fibres. It’s therefore not possible to guarantee that there will be no shedding
Below are some tips on how to get the best result when working with hairier yarns:
1. When the garment is finished (before you wash it) shake it vigorously so the looser hairs come off. NOTE: do NOT use a lint roller, brush or any method that pulls at the yarn.
2. Place the garment in a plastic bag and put it in your freezer - the temperature will cause the fibres to become less attached to each other, and excess fibres will come off easier.
3. Leave in the freezer for a few hours before taking it out and shaking it again.
4. Wash the garment according to the instructions on the yarn label.
Why does my garment pill?
Pilling is a natural process that happens to even the most exclusive of fibers. It's a natural sign of wear and tear that is hard to avoid, and that is most visible in high friction areas of your garment like a sweater's arms and cuffs.
You can make your garment look as new by removing the pilling, using a fabric comb or a pill/lint remover.
Carry All |
|
|
|
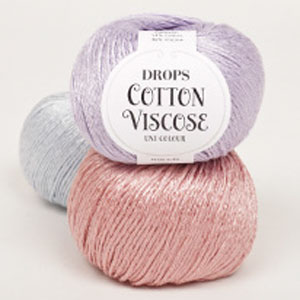
Crochet bag/tote bag in DROPS Lin and DROPS Cotton Viscose or DROPS Muskat and DROPS Safran
DROPS 139-11 |
|
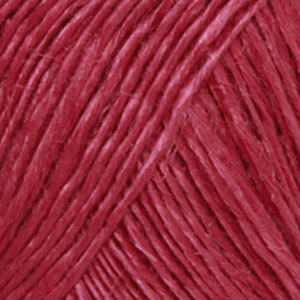
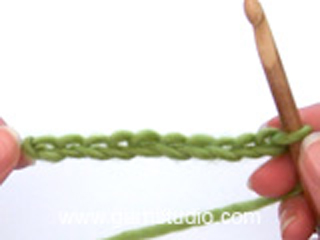
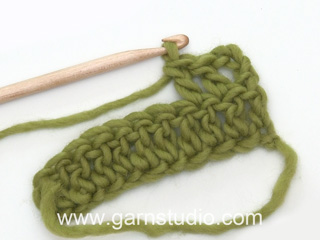
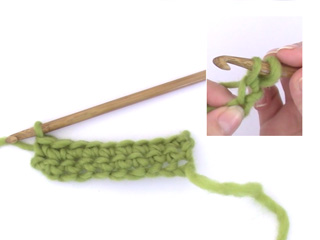
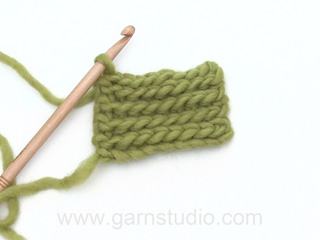
DC ROUNDS (applies to bag): Beg every round with 1 ch and 1 dc in 1st dc, and finish with 1 sl st in 1st dc. TR-GROUPS: 1 tr-group = 2 tr, 2 ch, 2 tr in same ch-loop. Beg every tr-group round with sl st until 1st ch-loop, 3 ch, 1 tr, 2 ch, 2 tr in same ch-loop, then 1 tr-group in every ch-loop, finish with 1 sl st in 3rd ch from beg of round. DC IN A CIRCLE (applies to handle): After last dc on 1st round, work 1 dc in next dc, then work in the round with 1 dc in every dc. --------------------------------------------------------- BAG: Worked in the round with 1 thread Lin linen/Muskat light taupe and 1 thread Cotton Viscose light beige/Safran beige on hook size 5 mm as follows: ROUND 1: Work 2 ch, 8 dc in 1st ch, finish with 1 sl st in 1st dc = 8 dc - Read DC ROUNDS above. ROUND 2: Work 2 dc in every dc = 16 dc. ROUND 3: Work * 1 dc in next dc, then 2 dc in next dc *, repeat from *-* = 24 dc (8 new sts). ROUND 4: Work * 1 dc in each of the next 2 dc, then 2 dc in next dc *, repeat from *-* = 32 dc. ROUND 5: Work * 1 dc in each of the next 3 dc, then 2 dc in next dc *, repeat from *-* = 40 dc. ROUND 6: Work * 1 dc in each of the next 4 dc, then 2 dc in next dc *, repeat from *-* = 48 dc. ROUND 7: Work * 1 dc in each of the next 5 dc, then 2 dc in next dc *, repeat from *-* = 56 dc. ROUND 8: Work 1 dc in every dc = 56 dc. Repeat 7TH and 8TH ROUND to inc 8 new sts every other round (i.e. work 1 dc in each of the next 6, 7, 8 etc. dc, then 2 dc in next dc) until there are 96 dc on round, work 1 round with 1 dc in every dc (= 18TH ROUND). ROUND 19: Work * 1 dc in each of the next 7 dc, then 2 dc in next dc *, repeat from *-* = 108 dc (12 new sts). ROUND 20: Work 1 dc in every dc = 108 dc. Repeat 19TH and 20TH ROUND to inc 12 new sts every other round (i.e. work 1 dc in each of the next 8 and 9 dc, then 2 dc in next dc) until there are 132 dc on round. Then work 1 dc in every dc until piece measures 9 cm from the last inc (piece measures approx. 22 cm from 1ST ROUND). Then work as follows: Work as follows in 1st dc: 3 ch, 1 tr, 2 ch, 2 tr, * skip 3 dc, 1 tr-group in next dc * - Read TR-GROUPS above, repeat from *-* the entire round, finish by skipping 3 dc and work 1 sl st in 3rd ch from beg of round = 33 tr-groups. Work the round with tr-groups for approx. 23 cm (piece measures approx. 45 cm from 1ST ROUND). Work next round as follows: 1 ch, 3 dc in every ch-loop the entire round, finish with 4 dc in last ch-loop on round = 100 dc. Work 1 dc in every dc for 6 rounds. Work next round as follows: 10 dc, * 2 ch, skip 2 dc, 26 dc, 2 ch, skip 2 dc *, 20 dc, repeat from *-* 1 more time, finish with 10 dc = 4 openings for handle. Continue with 1 dc in every dc (1 dc in every ch over the openings) for 6 more rounds, cut and fasten the threads (piece measures approx. 6 cm from 1st round with dc after last round with tr-groups). HANDLE: Worked in the round. Crochet 5 ch with 2 threads Lin brown/Muskat clove on hook size 5 mm and form a ring with 1 sl st in first ch. Work 1 dc in every ch = 5 dc. Then work DC IN A CIRCLE - Read explanation above - for approx. 80 cm (or desired length), cut and fasten the threads. Work another handle the same way. ASSEMBLY: Pull the ends on the handle through the openings on the bag from WS, make a knot. Repeat in the other side. |
|
Have you made this or any other of our designs? Tag your pictures in social media with #dropsdesign so we can see them! Do you need help with this pattern?You'll find tutorial videos, a Comments/Questions area and more by visiting the pattern on garnstudio.com. © 1982-2024 DROPS Design A/S. We reserve all rights. This document, including all its sub-sections, has copyrights. Read more about what you can do with our patterns at the bottom of each pattern on our site. |
With over 40 years in knitting and crochet design, DROPS Design offers one of the most extensive collections of free patterns on the internet - translated to 17 languages. As of today we count 304 catalogues and 11422 patterns - 11422 of which are translated into English (UK/cm).
We work hard to bring you the best knitting and crochet have to offer, inspiration and advice as well as great quality yarns at incredible prices! Would you like to use our patterns for other than personal use? You can read what you are allowed to do in the Copyright text at the bottom of all our patterns. Happy crafting!
Comments / Questions (44)
Fabiana wrote:
Hola, no entiendo como se sigue luego de llegar a la altura deseada con los avanicos. Como se llega a los 100 pts. Muchas gracias por la explicacion
02.12.2022 - 14:22DROPS Design answered:
Hola Fabiana, después de llegar a la altura deseada deberías tener 33 arcos de cadenetas. En la siguiente vuelta, trabajar 1 punto de cadeneta, 3 p.b en cada uno de los siguientes 32 arcos (= 96 pts) y 4 p.b en el último arco (= 4 pts). En total tienes 100 p.b.
06.12.2022 - 19:00Ida wrote:
Buongiorno , mi ruotano 35 gruppi di maglia alte e non 33; forse sbaglio l'inizio. È corretto fare tre maglie bassissime è poi le tre catenelle che sostituiscono la prima maglia alta? Grazie mille siete bravissime.
21.07.2022 - 11:18DROPS Design answered:
Buongiorno Ida, deve lavorare il giro come indicato nelle spiegazioni. Buon lavoro!
23.07.2022 - 14:20Karoline wrote:
Hallo! Häkelt man alle 30 Stb. Gruppen weiter in die Höhe? Ohne Kettm. am Ende der Runden? Die Tasche scheint nach oben hin immer weiter zu werden. Danke!
26.03.2020 - 17:29DROPS Design answered:
Liebe Karoline, Sie häkeln 33 Stb-Gruppen wie unter STB-GRUPPE erklärt (Anfang +Ende der Runden) bis 23 cm mit Stb-Gruppen gehäkelt wird. Dann häkeln Sie weiter mit fM. Viel Spaß beim häkeln!
27.03.2020 - 09:37Jutta wrote:
Hallo! Bitte um Hilfe! Ersetzt die erste Luftmasche die erste feste Masche? Zähle ich die erste feste Masche die ich mache dann also schon als 2. Masche der Runde? Z. B. Runde 3: Eine Luftmasche ( ersetzt die erste feste Masche) und dann gleich 2 feste Maschen in die nächste feste Masche? Danke!! Liebe Grüße
25.03.2020 - 09:31DROPS Design answered:
Liebe Jutta, die 1. Luftmasche erzetzt nicht die erste feste Maschen am Anfang der Runde, dh jede Runde wird mit 1 Luftmaschen anfangen und am Ende der Runde häkeln Sie 1 KettMasche in die 1. feste Masche der Runde. Viel Smpaß beim häkeln!
25.03.2020 - 10:18Monique Kruissen wrote:
Boven genoemd garen is er niet meer, met welk garen kan ik deze tas haken? Bij voorbaat dank.
28.05.2018 - 12:00DROPS Design answered:
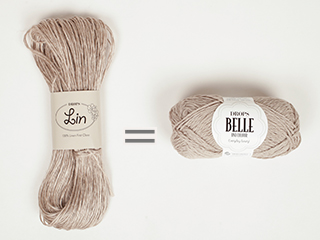
Dag Monique, Een katoengaren uit categorie A is een goed alternatief, bijvoorbeeld DROPS Safran of DROPS ♥ You #9 of #7.
30.05.2018 - 13:37Irene Bolovis wrote:
I have restarted this bag twice now. I am up to row 22 and so far I have a large disk. When will the bag start looking like a cylinder. Shouldn't I do a row in the back loops only so it will start shaping upward instead of flat. I'm very confused.
19.06.2017 - 13:21DROPS Design answered:
Dear Mrs Bolovis, you are increasing until there are 132 sts in the round, then continue without increasing until piece measures 22 cm from 1st round (not in diameter). Sts are not worked into back loop, just as usual. Happy crocheting!
19.06.2017 - 16:52PK Ang wrote:
Is the bag begins from the bottom? Is the DC ROUNDS applies to every round of the bag and "sl" is needed for end of every round? Thks
22.04.2016 - 02:31DROPS Design answered:
Dear PK Ang, correct, the bag is worked from bottom up, starting with the bottom. The bottom consists of a round of dc, start each round with 1 ch (des not replace 1st dc) and finish with round with 1 sl st in 1st dc at the beg of round. Happy crocheting!
22.04.2016 - 08:58Anne Louise Spencer wrote:
Is Drops Bomull Lin colour light beige (03) or colour beige (11) a better blend with DROPS COTTON VISCOSE colour light beige (17) for this pattern? Thankyou.
31.12.2015 - 02:58DROPS Design answered:
Dear Mrs Spencer, please contact your DROPS Store for any help choosing your colours. They will answer even per mail or telephone. Happy crocheting!
02.01.2016 - 15:56Kuba Margit wrote:
Liebes Drops-Team, hilfe!!! Bin gerade bei der 4. Reihe des Muschelmusters, und muss leider feststellen, dass die Wolle bei Weitem nicht reichen wird. Mach ich da irgendwas falsch? Sollte ich vielleicht fester häkeln, da es mir ab diesem Muster auch sehr weit und locker vorkommt?
27.07.2015 - 15:15DROPS Design answered:
Liebe Margit, haben Sie die Maschenprobe genau eingehalten? Das ist ganz wichtig, damit die Menge des Garns reicht. Wenn Sie den Eindruck haben, dass das Muschelmuster sehr locker ausfällt, versuchen Sie, es fester zu häkeln oder eine dünnere Nadelstärke zu verwenden. Es sollte auch zum unteren Teil der Tasche passen und sich nicht stark wellen oder zusammenziehen.
28.07.2015 - 13:12Claudio Pradella wrote:
Buon giorno, io vorrei realizzare la borsa Drops Carry All modello n°LN-O25 ma non riesco a trovare nei vs. prodotti il filato DROPS LIN, mi potreste comunicare con quale prodotto è possibile sostituirlo per poter effettuare l'ordine? Grazie.
31.01.2015 - 13:53DROPS Design answered:
Buongiorno Claudio, purtroppo il filato Lin è fuori produzione, ma quiqui può vedere la pagina con le sue caratteristiche e trovare un filato sostitutivo, ad esempio in cotone, visto che la borsa è estiva. Si ricordi di controllare il metraggio corretto prima di effettuare l'ordine: nella pagina indicata troverà un link che le indica come fare. Buon lavoro!!
31.01.2015 - 14:38