Clicking the ORDER button will redirect you to Wool Warehouse Direct Ltd website
The yarn cost is calculated from the pattern’s smallest size and the yarn’s cheapest product type. Looking for an even better price? You might find it on the DROPS Deals!
-------------------------------------------------------
Alternative Yarn – See how to change yarns here
Yarn Groups A to F – Use the same pattern and change the yarn here
Yarn usage using an alternative yarn – Use our yarn converter here
-------------------------------------------------------
Clicking the ORDER button will redirect you to Wool Warehouse Direct Ltd website
The yarn cost is calculated from the pattern’s smallest size and the yarn’s cheapest product type. Looking for an even better price? You might find it on the DROPS Deals!
This pattern has been corrected. Click here to see the correction/s.
Each of our patterns has specific tutorial videos to help you.
These step-by-step tutorials might also help you:
Why is the knitting/crochet tension so important?
Knitting tension is what determines the final measurements of your work, and is usually measured per 10 x 10 cm. It is provided like so: number of stitches in width x number of rows in height - eg: 19 stitches x 26 rows = 10 x 10 cm.
The knitting tension is very individual; some people knit/crochet loosely while others work tightly. You adjust the knitting tension with the needle size, which is why the suggested needle size is only meant as a guide! You need to adjust this (up or down) to ensure that YOUR knitting tension matches the knitting tension provided in the pattern. If you work with a different knitting tension than provided you will have a different yarn consumption, and your work will have different measurements than what the pattern suggests.
The knitting tension also determines which yarns can replace each other. As long as you achieve the same knitting tension you can replace one yarn with another.
See DROPS lesson: How to measure your tension/gauge
See DROPS video: How to make a gauge tension swatch
How do I know how many balls of yarn I need?
The required amount of yarn is provided in grams, eg: 450 g. To calculate how many balls you’ll need you first need to know how many grams are in 1 ball (25g, 50g or 100g). This information is available if you click on the individual yarn quality on our pages. Divide the amount required with the amount of each ball. For example, if each ball is 50g (the most common amount), the calculation will be as follows: 450 / 50 = 9 balls.
Can I use a different yarn than what the pattern suggests?
The important thing when changing from one yarn to another is that the knitting/crochet tension remains the same. This is so that the measurements of the finished piece will be the same as on the sketch provided. It is easier to achieve the same knitting tension using yarns from the same yarn group. It is also possible to work with multiple strands of a thinner yarn to achieve the knitting tension of a thicker one. Please try our yarn converter. We recommend you to always work a test swatch.
Please NOTE: when changing yarn the garment might have a different look and feel to the garment in the photo, due to individual properties and qualities of each yarn.
See DROPS lesson: Can I use a different yarn than the one mentioned in the pattern?
What are the yarn groups?
All our yarns are categorised into yarn groups (from A to F) according to thickness and knitting tension – group A contains the thinnest yarns and group F the thickest. This makes it easier for you to find alternative yarns to our patterns, should you wish to switch yarn. All yarns within the same group have a similar knitting tension and can easily replace each other. However, different yarn qualities have different structures and properties which will give the finished work a unique look and feel.
How do I use the yarn calculator?
At the top of all our patterns you’ll find a link to our yarn calculator, which is a helpful tool should you wish to use a different yarn than suggested. By filling in the yarn quality you wish to replace, the amount (in your size) and number of strands, the calculator will present good alternative yarns with the same knitting tension. Additionally it will tell you how much you’ll require in the new qualities and whether you’ll need to work with multiple strands. Most skeins are 50g (some are 25g or 100g).
If the pattern is worked with multiple colours, every colour will have to be calculated separately. Similarly, if the pattern is worked with several strands of different yarns (for example 1 strand Alpaca and 1 strand Kid-Silk) you will have to find alternatives for each, individually.
Why do you show discontinued yarns in the patterns?
Since different yarns have different qualities and textures we have chosen to keep the original yarn in our patterns. However, you can easily find options among our available qualities by using our yarn calculator, or simply pick a yarn from the same yarn group.
It is possible that some retailers still have discontinued yarns in stock, or that someone has a few skeins at home that they would like to find patterns for.
The yarn calculator will provide both alternative yarn as well as required amount in the new quality.
What size should I knit?
If you think it's hard to decide what size to make, it can be a good idea to measure a garment you own already and like the size of. Then you can pick the size by comparing those measures with the ones available in the pattern's size chart.
You'll find the size chart at the bottom of the pattern.
See DROPS lesson: How to read size chart
Why do I get the wrong knitting tension with the suggested needle size?
The needle size provided in the pattern serves only as a guide, the important thing is to follow the knitting tension. And since knitting tension is very individual, you will have to adjust the needle size to ensure that YOUR tension is the same as in the pattern – maybe you’ll have to adjust 1, or even 2 needle sizes, up or down to achieve the correct tension. For this, we recommend that you work test swatches.
Should you work with a different knitting tension than the one provided, the measurements of the finished garment might deviate from the measurement sketch.
See DROPS lesson: How to measure your tension/gauge
See DROPS video: How to make a tension/gauge swatch
Why is the pattern worked top-down?
Working a garment top-down provides more flexibility and room for personal adjustment. For example it is easier to try the garment on while working, as well as making adjustments to length of yoke and shoulder caps.
The instructions are carefully explaining every step, in the correct order. Diagrams are adjusted to the knitting direction and are worked as usual.
How do I work according to a knitting diagram?
The diagram depicts all rows/rounds, and every stitch seen from the right side. It is read from bottom to top, from right to left. 1 square = 1 stitch.
When working back and forth, every other row is worked from the right side and every other row is worked from the wrong side. When working from the wrong side, the diagram will have to be worked reversed: from left to right, knit stitches are purled, purl stitches are knit etc.
When working in the round every round is worked from the right side and the diagram are worked from right to left on all rounds.
See DROPS lesson: How to read knitting diagrams
How do I work according to a crochet diagram?
The diagram depicts all rows/rounds, and every stitch seen from the right side. It is worked from bottom to top, from right to left.
When working back and forth every other row is worked from the right side: from right to left and every other row is worked from the wrong side: from left to right.
When working in the round, every row in the diagram are worked from the right side, from right to left.
When working a circular diagram you start in the middle and work your way outwards, counter clockwise, row by row.
The rows usually start with a given number of chain stitches (equivalent to the height of the following stitch), this will either be depicted in the diagram or explained in the pattern.
See DROPS lesson: How to read crochet diagrams
How do I work several diagrams simultaneously on the same row/round?
Instructions for working several diagrams after each other on the same row/round, will often be written like so: “work A.1, A.2, A.3 a total of 0-0-2-3-4 times". This means you work A.1 once, then A.2 is worked once, and A.3 is repeated (in width) the number of times provided for your size – in this case like so: S = 0 times, M = 0 times, L=2 times, XL= 3 times and XXL = 4 times.
The diagrams are worked as usual: begin with the first row in A.1, then work the first row in A.2 etc.
See DROPS lesson: How to read knitting diagrams
See DROPS lesson: How to read crochet diagrams
Why are the sleeves shorter in larger sizes?
The total width of the garment (from wrist-to-wrist) will be larger in the larger sizes, despite the actual sleeves being shorter. The larger sizes have longer sleeve caps and wider shoulders, so there will be a good fit in all sizes.
Where on the garment is the length measured?
The measurement sketch/schematic drawing provides information regarding the full length of the garment. If it’s a jumper or a jacket the length is measured from the highest point on the shoulder closest to the neckline, and straight down to the bottom of the garment. It is NOT measured from the tip of shoulder. Similarly, the length of yoke is measured from the highest point on the shoulder and down to where yoke is split into body and sleeves.
On a jacket measures are never taken along bands, unless specifically stated. Always measure inside band stitches when measuring the length.
See DROPS lesson: How to read a schematic drawing
What is a repeat?
Diagrams are often repeated on the round or in height. 1 repeat is the diagram the way it appears in the pattern. If it says to work 5 repeats of A.1 in the round, then you work A.1 a total of 5 times after/next to each other in the round. If it says to work 2 repeats of A.1 vertically/in height you work the entire diagram once, then begin again at the start and work the entire diagram one more time.
Why does the piece start with more chain stitches than it’s worked with?
Chain stitches are slightly narrower than other stitches and to avoid working the cast-on edge too tight, we simply chain more stitches to begin with. The stitch count will be adjusted on the following row to fit the pattern and measurement sketch.
Why increase before the rib edge when the piece is worked top-down?
The rib edge is more elastic and will contract slightly compared to, for example, stocking stitch. By increasing before the rib edge, you avoid a visible difference in width between the rib edge and the rest of the body.
Why increase in the cast-off edge?
It’s very easy to cast off too tightly, and by making yarn overs while casting off (and simultaneously casting these off) you avoid a too tight cast off edge.
See DROPS video: How to bind off with yarn overs (yo)
How do I increase/decrease on every 3rd and 4th row/round alternately?
To achieve an even increase (or decrease) you can increase on, for example: every 3rd and 4th row alternately, like so: work 2 rows and increase on the 3rd row, work 3 rows and increase on the 4th. Repeat this until the increase is complete.
See DROPS lesson: Increase or decrease 1 st on every 3rd and 4th row alternately
How can I work a jacket in the round instead of back and forth?
Should you prefer to work in the round instead of back and forth, you may of course adjust the pattern. You’ll need to add steeks mid-front (usually 5 stitches), and follow the instructions. When you would normally turn and work from the wrong side, simply work across the steek and continue in the round. At the end you’ll cut the piece open, pick up stitches to work bands, and cover the cut edges.
See DROPS video: How to knit steeks and cut open
Can I work a jumper back and forth instead of in the round?
Should you prefer to work back and forth instead of in the round, you may of course adjust the pattern so you work the pieces separately and then assemble them at the end. Divide the stitches for the body in 2, add 1 edge stitch in each side (for sewing) and work the front and back pieces separately.
See DROPS lesson: Can I adapt a pattern for circular needles into straight needles?
Why is the pattern slightly different than what I see in the photo?
Pattern repeats can vary slightly in the different sizes, in order to get the correct proportions. If you’re not working the exact same size as the garment in the photo, yours might deviate slightly. This has been carefully developed and adjusted so that the complete impression of the garment is the same in all sizes.
Make sure to follow instructions and diagrams for your size!
How do I make a women’s size garment into a men’s size one?
If you have found a pattern you like which is available in women’s size it’s not very difficult to convert it to men’s size. The biggest difference will be the length of sleeves and body. Start working on the women size that you think would fit across the chest. The additional length will be worked right before you cast off for the armhole/sleeve cap. If the pattern is worked top-down you can add the length right after the armhole or before the first decrease on sleeve.
Regarding additional yarn amount, this will depend on how much length you add, but it is better with a skein too many than too few.
How do I prevent a hairy garment from shedding?
All yarns will have excess fibres (from production) that might come off as lint or shedding. Brushed yarns (ie hairier yarns) have more of these loose, excess fibres, causing more shedding.
Shedding also depends on what is worn under or over the garment, and whether this pulls at the yarn fibres. It’s therefore not possible to guarantee that there will be no shedding
Below are some tips on how to get the best result when working with hairier yarns:
1. When the garment is finished (before you wash it) shake it vigorously so the looser hairs come off. NOTE: do NOT use a lint roller, brush or any method that pulls at the yarn.
2. Place the garment in a plastic bag and put it in your freezer - the temperature will cause the fibres to become less attached to each other, and excess fibres will come off easier.
3. Leave in the freezer for a few hours before taking it out and shaking it again.
4. Wash the garment according to the instructions on the yarn label.
Why does my garment pill?
Pilling is a natural process that happens to even the most exclusive of fibers. It's a natural sign of wear and tear that is hard to avoid, and that is most visible in high friction areas of your garment like a sweater's arms and cuffs.
You can make your garment look as new by removing the pilling, using a fabric comb or a pill/lint remover.
Winter Woof |
|
|
|
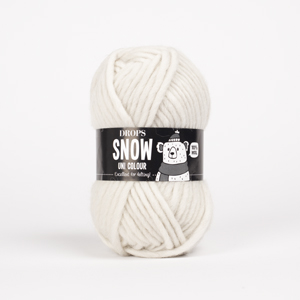
Knitted jumper for dogs in DROPS Snow. The piece is worked from neck to tail. Sizes XS - L.
DROPS 102-44 |
|
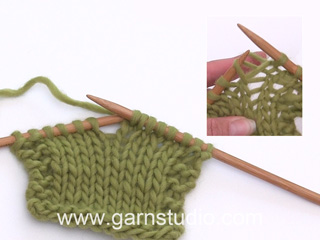
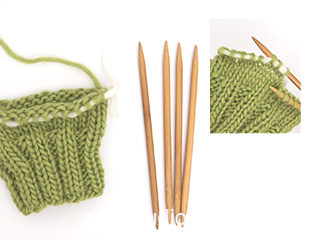
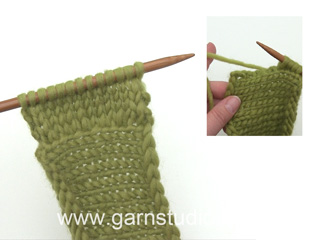
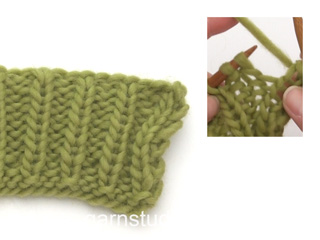
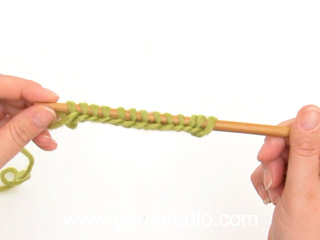
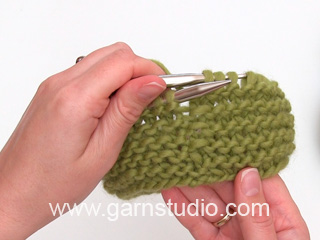
------------------------------------------------------- EXPLANATIONS FOR THE PATTERN: ------------------------------------------------------- INCREASE TIP: Increase on each shoulder as follows: Increase before the purl stitches (before 2 knit stitches, middle of shoulder) and after the purl stitches (after 2 knit stitches, middle of shoulder). Increase by making 1 yarn over, on next round purl yarn over twisted. Increase 2 stitches on each shoulder (= 4 stitches per round), there will be more and more purl stitches on each shoulder. ------------------------------------------------------- START THE PIECE HERE: ------------------------------------------------------- DOG JUMPER – SHORT OVERVIEW OF THE PIECE: The neck and yoke are worked in the round, top down. The yoke is divided for the front legs, then the body continued in the round. The last section of the body is worked back and forth across the back. Rib is worked in the round at the bottom of the body. The legs are worked in the round with double pointed needles. NECK: Cast on 28-40-48-56 stitches with double pointed needles/short circular needle size 6 mm and DROPS Snow. Work as follows in the different sizes: SIZES XS - S - L: Knit 1, * purl 2, knit 2 *, work from *-*, finish with purl 2, knit 1. SIZE M: Purl 1, * knit 2, purl 2 *, work from *-*, finish with knit 2, purl 1. ALL SIZES: Continue this rib for 6-6-8-8 cm. The beginning of the round is under the tummy. YOKE: Change to double pointed needles/short circular needle size 7 mm, Knit 1 round, purl 1 round. Insert 1 marker to measure the yoke from. Work the next round as follows: Knit 1-1-3-5, purl 2, knit 2 (= mid-shoulder), purl 2, knit 14-26-30-34, purl 2, knit 2 (= mid-shoulder), purl 2, knit 1-1-3-5. Continue with knit over knit and purl over purl – and on the first round increase 1 stitch on each side of the 6 ribbed stitches on each shoulder – read INCREASE TIP: Increase like this every round a total of 7-7-8-7 times, then every 2nd round 0-1-2-4 times = 56-72-88-100 stitches. Continue with knit over knit and purl over purl until the yoke measures 5-6-8-10 cm from the marker. Now divide for the front legs: Knit 3-5-7-9 (half the tummy), knit the next 16-18-24-26 stitches and place them on a thread for the leg, knit 18-26-26-30 (back), knit the next 16-18-24-26 stitches and place them on a thread for the leg, knit the last 3-5-7-9 stitches (half the tummy). Insert 1 marker mid-back to measure the body from. BODY: Now work back and forth as follows: Knit 3-5-7-9, turn, purl 6-10-14-18, turn. Knit 3-5-7-9, insert 1 marker-thread here; start of round = mid-under tummy. Work as follows from the right side: Knit 3-5-7-9, cast on 2-4-6-8 stitches, knit 18-26-26-30, cast on 2-4-6-8 stitches, knit 3-5-7-9 = 28-44-52-64 stitches. Continue with stocking stitch in the round for a further 3-6-8-10 cm. Knit the first 3-6-8-10 stitches and place them on a thread together with the last 3-6-8-10 stitches on the round (6-12-16-20 tummy-stitches). Knit to end of row, turn. Continue back and forth as follows: ROW 1 (wrong side): Slip the first stitch purl-wise, tighten the strand and purl to end of row, turn. ROW 2 (right side): Slip the first stitch knit-wise, tighten the strand and knit until there is 1 stitch left, turn. Continue back and forth like this, turning 1 stitch earlier on each row. Turn a total of 7-7-8-10 times on each side and with the last row from the right side working 8-18-20-24 stitches (mid-back). The body measures approx. 13-16-19-24 cm from the second marker. Place all stitches back on the needle = 28-44-52-64 stitches. Cut the strand and begin mid-under tummy. Purl 1 round – to avoid holes where you turned, pick up the strand between the 2 stitches and knit it together with the next stitch. Change to circular needle size 6 mm. Work rib in the round (knit 2, purl 2) for 3-5-6-7 cm. Cast off a little loosely. The body measures approx. 16-21-25-31 cm from the second marker. The jumper measures 27-33-41-49 cm from the cast-on to the cast-off edge (along the back). FRONT LEGS: Place the 16-18-24-26 stitches from one thread on double pointed needles size 6 mm and knit up 4-6-8-10 stitches in the cast-on stitches on the yoke = 20-24-32-36 stitches. Work rib in the round (knit 2, purl 2) – make sure the 2 knitted stitches on the shoulder are knitted in the rib. Work until the leg measures 3-6-8-10 cm, loosely cast off with rib. Repeat on the other leg. |
|
Have you made this or any other of our designs? Tag your pictures in social media with #dropsdesign so we can see them! Do you need help with this pattern?You'll find tutorial videos, a Comments/Questions area and more by visiting the pattern on garnstudio.com. © 1982-2024 DROPS Design A/S. We reserve all rights. This document, including all its sub-sections, has copyrights. Read more about what you can do with our patterns at the bottom of each pattern on our site. |
With over 40 years in knitting and crochet design, DROPS Design offers one of the most extensive collections of free patterns on the internet - translated to 17 languages. As of today we count 304 catalogues and 11422 patterns - 11422 of which are translated into English (UK/cm).
We work hard to bring you the best knitting and crochet have to offer, inspiration and advice as well as great quality yarns at incredible prices! Would you like to use our patterns for other than personal use? You can read what you are allowed to do in the Copyright text at the bottom of all our patterns. Happy crafting!
Comments / Questions (20)
Lucia Battisti wrote:
Buongiorno sono arrivata alla lavorazione del corpo (precisamente al punto dove dice "continuare in piano come segue :") , non capisco cosa significa tirare il filo. Grazie
04.04.2024 - 11:19DROPS Design answered:
Buonasera Lucia, deve tirare il filo perchè c'è una maglia passata. Buon lavoro!
04.04.2024 - 23:30Ivana wrote:
Hola, para talla M según el patrón desde el cuello hasta la apertura de la manga son 13cm (31-18=13) y después 10cm elástico un total de 23cmMANGA No se corresponde con la foto y si es talla S tampoco .segun el patrón la manga es larguísima. Gracias
05.10.2022 - 09:20DROPS Design answered:
Hola Ivana, la manga o pata del jersey son solamente los 10 cm del elástico. Los 13 cm son del dibujo del cuerpo, y no la propia pata. Ten en cuenta que los tamaños de los perros son aproximados y hay mucha variación entre razas, por lo que puede que sea necesario ajustar las medidas de ciertas partes para cada perro.
09.10.2022 - 23:01Deborah wrote:
For a size L you need how many balls of \"snow\"yarn? It says 300g for L =6 balls? Also, my dog is 44 lb 26\" chest will the L size be ok... should I use larger needle us 11? Also, some comments said the US English instructions were difficult to follow. Have the directions been clarified? Thank you for your help. I am an advanced beginner., but I would really like to try this sweater pattern for my dog, Beau!
23.08.2022 - 08:40DROPS Design answered:
Dear Deborah, correct you will need 300 g DROPS Snow / 50 g a ball = 6 balls for a size L. Check the measurements give for each size to find the appropriate size. Read the pattern and feel free to use this space to ask your questions if you have some. Happy knitting!
23.08.2022 - 13:30Doris wrote:
Die kleinste Größe S passt auch meiner Katze!
24.07.2022 - 16:18Trine Ergarth wrote:
Super flot trøje, men jeg synes ikke billedet viser, hvor lang halsen er på denne model
24.01.2022 - 15:00Annelouise wrote:
Er i tvivl om udtagningerne. Er det kun på hveranden pind eller er det på de første 8 pinde, hvorefter man så bare fortsætter ribben til arbejdet måler hvad det skal?
21.12.2021 - 11:07DROPS Design answered:
Hei Annelouise. Du øker 1 maske på hver side av de 2 feltene med 2vrang-2rett-2vrang. Du øker på hver 2.pinne 8 ganger (=16 omganger). mvh DROPS Design
21.12.2021 - 13:48Chantal wrote:
Bonjour est-ce que je peut prendre des aiguilles normal .pourquoi bou ron aiguille circulaire merci
28.01.2021 - 18:34DROPS Design answered:
Bonjour Chantal, vous trouverez ici une leçon donnant quelques astuces sur les aiguilles circulaires et comment adapter un modèle sur aiguilles droites. Bon tricot!
29.01.2021 - 07:41Jonna wrote:
Ohjeesta puuttuu ennen helmaresoria nurja ja oikea kerros.
19.11.2020 - 21:35Ma wrote:
The pattern is Very difficult to understand for beginner.
13.10.2019 - 09:38Mia wrote:
I love garn studio’s design however very difficult to understand with way of writing pattern.wish if pattern is written like US pattern which step by step all Row.
13.10.2019 - 09:37